Electronics Basics
Arduino Uno - The Board That Started It All
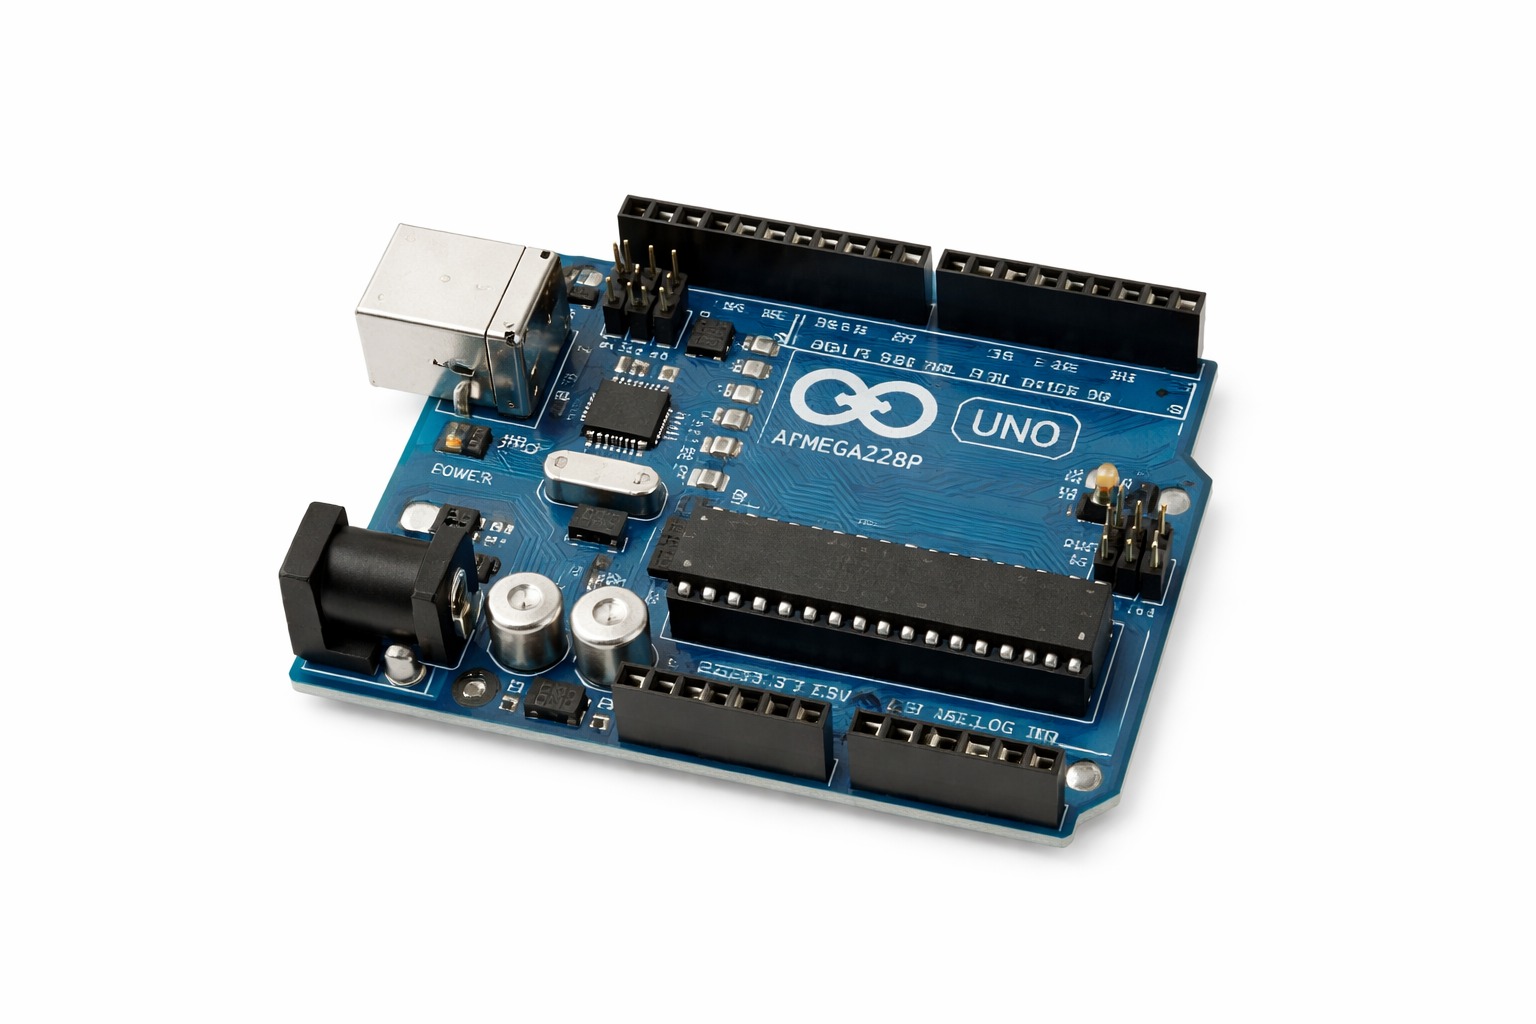
The Arduino Uno made microcontroller development approachable for millions by combining easy hardware, a simple software model, and a huge learning ecosystem.
Full Article
There are very few products in any industry that can genuinely be called world-changing. The Arduino Uno is one of them. Since its release in 2010, this unassuming blue circuit board has introduced literally millions of people - students, artists, engineers, teachers, hobbyists, and professionals - to the world of electronics and physical computing. It did not do this by being the fastest, cheapest, or most powerful board available. It did it by being the most approachable. And in education and prototyping, approachability beats raw power every single time. The Origin Story To understand why the Arduino Uno matters, you need to understand what electronics prototyping looked like before it existed. Prior to Arduino, building something with a microcontroller meant buying a chip, understanding a dense 400-page datasheet, setting up a specialized programming environment, connecting a hardware programmer, writing low-level C code, and hoping for the best. It was a hobby for electronics engineers - not artists, not designers, not curious teenagers. A team at the Interaction Design Institute Ivrea in Italy, led by Massimo Banzi, wanted to change that. They built Arduino - an open-source hardware and software platform designed to make microcontroller programming accessible to everyone. The Uno, meaning one in Italian, was the board that cemented the platform's dominance and became the global standard for beginner electronics. What's Inside the Arduino Uno The Uno is powered by the ATmega328P, an 8-bit AVR microcontroller made by Microchip (formerly Atmel). It runs at 16 MHz with 2 KB of SRAM and 32 KB of Flash memory. By modern standards these numbers sound tiny - and they are. But they are more than enough for the vast majority of real-world projects: reading sensors, controlling motors, driving displays, communicating over serial - all of this runs smoothly on the ATmega328P. The board operates at 5V logic, which is one of its most practically important features. Most beginner-friendly sensors, servo motors, relay modules, and display modules are designed for 5V. They wire directly to the Uno with no additional conversion circuitry. This matters enormously for beginners who are still learning - fewer components, fewer failure points, fewer mysteries. Pins, Ports, and What They Do The Uno gives you 14 digital I/O pins and 6 analog input pins. Six of the digital pins (marked with a tilde ~) support PWM output, which lets you simulate analog output - dimming an LED smoothly, controlling servo position, setting motor speed. The 6 analog pins each have a 10-bit ADC, reading voltages between 0 and 5V with 1024 steps of resolution. There is hardware I2C on pins A4 and A5, hardware SPI on pins 10 through 13, and hardware UART on pins 0 and 1 (shared with the USB connection). These communication buses let you connect hundreds of different sensors, displays, and modules using just two or three wires. The onboard USB-B connector (the square one) handles both power and programming - plug it into your computer, hit upload, and your code is running in seconds. There is also a barrel jack for 7-12V power when you want the board to run independently from a computer. The Arduino IDE - Programming Made Human The Arduino IDE is deliberately simplified. Your program has two functions: setup() which runs once at startup, and loop() which runs repeatedly forever. That is it. No main(), no interrupts to configure, no register initialization unless you want it. The structure alone eliminates dozens of common beginner errors. The language is a simplified C++ that reads almost like plain English. digitalWrite(13, HIGH) turns a pin on. analogRead(A0) reads a sensor. delay(1000) waits one second. Even someone who has never written a line of code can read an Arduino sketch and understand what it does - and that is a rare and valuable thing in programming. The Library Manager inside the IDE gives you one-click access to over 5,000 libraries. Want to drive a stepper motor? Three clicks to install AccelStepper. Want to show data on an OLED screen? Install Adafruit SSD1306 and you are done. The library ecosystem is the Uno's greatest multiplier - it transforms a beginner into someone who can build real things, fast. The Shield System - Instant Expansion Arduino's shield concept is one of the cleverest ideas in hobby electronics. Shields are expansion boards that stack directly on top of the Uno using its pin headers, adding major functionality without any soldering or complex wiring. A motor shield lets you control four DC motors or two stepper motors. An Ethernet shield gives the Uno a wired internet connection. A GSM shield adds cellular connectivity. A data logging shield adds an SD card and real-time clock. Each one plugs straight on top and usually works with a library installation. Why 5V Tolerance Is a Big Deal for Beginners Here is something experienced makers do not say often enough: the Arduino Uno is forgiving. Running at 5V with internal protection diodes on its GPIO pins, it can survive the kinds of wiring mistakes that kill other boards instantly. Accidentally connect a sensor backward? Usually fine. Apply 5V to an output pin? Often survives. This resilience is not accidental - it is a design choice that makes the Uno the right board for people who are still learning. Compare this to the ESP32, where applying 5V to a 3.3V GPIO permanently destroys it. Its Limitations Are Real - and That's OK The Uno's 2 KB of RAM is the most common wall developers hit. Complex programs with multiple string variables, large arrays, or heavy libraries quickly exhaust it. There is no wireless connectivity built in. The 16 MHz clock is too slow for audio processing or real-time signal analysis. These are not flaws - they are the natural boundaries of a board designed for learning. When you outgrow the Uno, you have learned something valuable: what resources a real project needs. The Arduino Uno does not need to be the last board you ever use. It just needs to be the first.
Key takeaway: Uno may not be the most powerful board, but it remains one of the best first boards to build confidence and fundamentals.